
 240
240 120
120 330
330 1020
1020Deck Primer
The first truly consistent (for Crystal Based) 1-card combo for Crystal Beast. (Bagooska is banned so I explain options later)
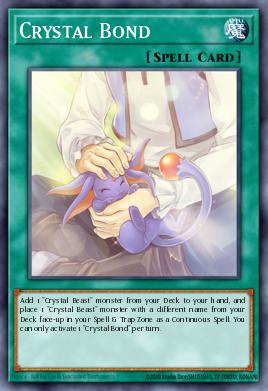
Crystal Bond Main Line
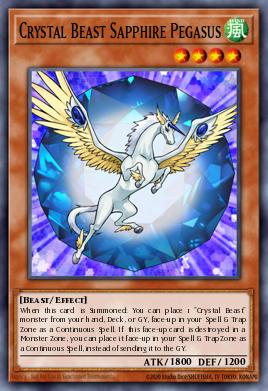
1) Crystal Bond to Add Crystal Beast Sapphire Pegasus and put Crystal Beast Rainbow Dragon in the backrow; then Normal Summon Pegasus
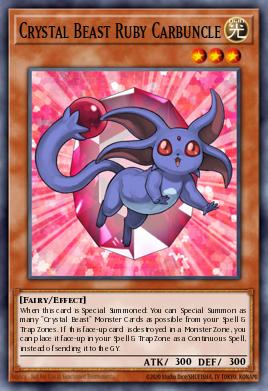
1.5) Pegasus eff: crystalize Crystal Beast Ruby Carbuncle
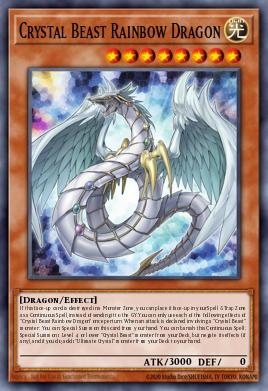
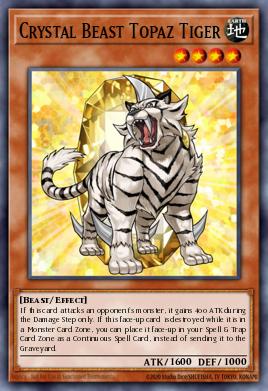
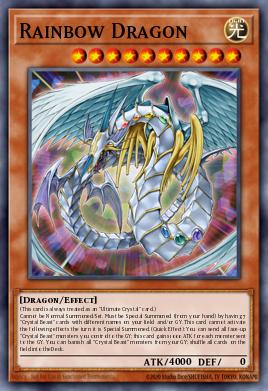
2) Crystal Beast Rainbow Dragon eff summon Crystal Beast Topaz Tiger (or another lvl 4 Crystal Beast garnet) & grab Rainbow Dragon.
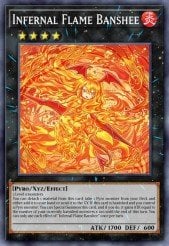
3) Make Infernal Flame Banshee detach Crystal Beast Sapphire Pegasus grab poplar
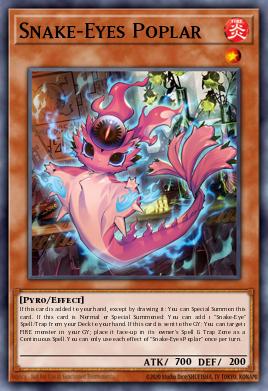
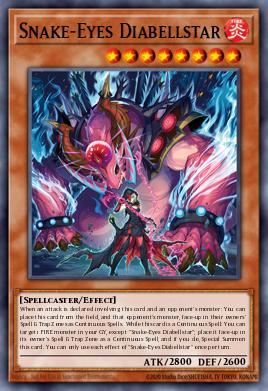
4) activate your poplar -> summon your poplar -> grab the snake-eyes field spell -> activate the field spell -> crystalize Snake-Eyes Diabellstar
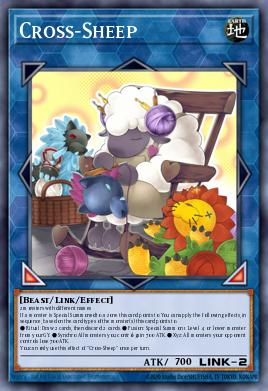
5) link off ya field for Cross-Sheep
6) poplar eff: put banshee in backrow
7) diabellstar eff put poplar in backrow to summon itself
8) make Snake-Eyes Doomed Dragon with carbunkle and Snake-Eyes Poplar into the cross-sheep zone
9) summon Carbunkle off of cross-sheep.
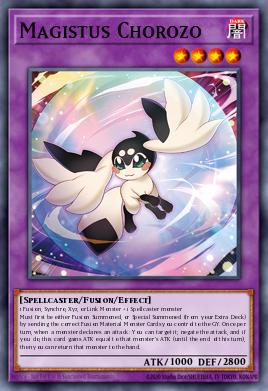
10) summon Magistus Chorozo using banshee and diabellstar
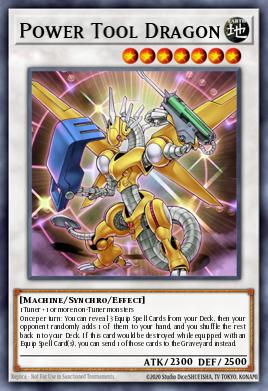
11) make Power Tool Dragon with chorozo and carbunkle
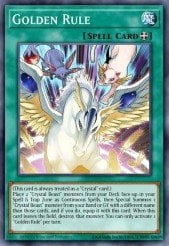
12) Powertool for Golden Rule
13) Golden Rule summon carbunkle & crystalize 2 pegasus
14) Carbunkle summon both crystalized pegasus'
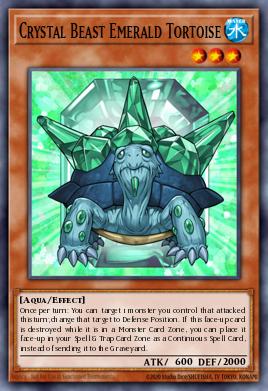
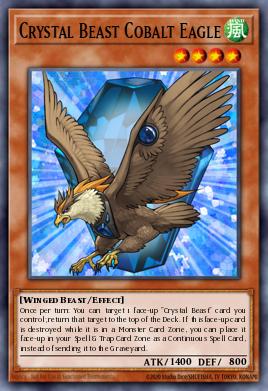
15) Pegasus one & two crystalize emerald tortise and cobalt eagle
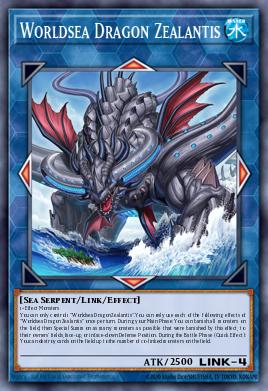
16) link into Worldsea Dragon Zealantis using cross-sheep power tool and doomed dragon
17) Do the zealantis shuffle
18) Carbunkle 1, Pegasus' 2 & 3 to crystalize pegasus and carbunkle. Then summon pegasus.
19) Pegasus eff crystalize another Crystal Beast Rainbow Dragon
20) make Charmer Quartet in Bloom using all but carbunkle
21) Quartet summon pegasus and cross-sheep
22) pegasus eff: crystalize pegasus
23) make the second chorozyo using Quartet and cross-sheep
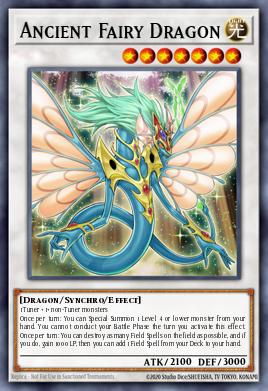
24) Make Ancient Fairy Dragon using Chryzyo and Carbunkle.
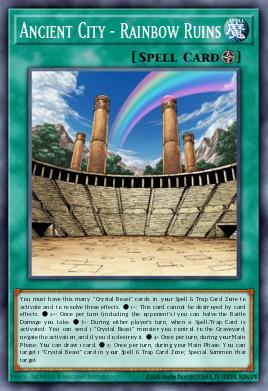
25) pop snake-eyes field spell to get Ancient City - Rainbow Ruins
26) Ruins draw 1 card. Ruins Summon Carbunkle
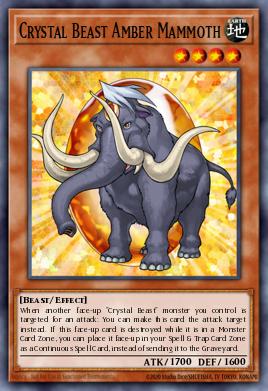
27) carbunkle summon pegasus and emerald turtle. Pegasus crystalize Crystal Beast Amber Mammoth
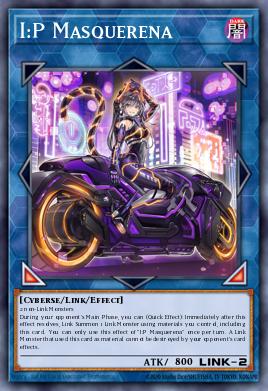
28) carbunkle and AFD for I:P Masquerena
Note: the following branches depending on what you open/draw. This main line assumes you opened/drawn into rainbow bridge
Determine your finishing route based on your hand:
- Rainbow Bridge: Main Line
- Awakening: You already have Awakening. Skip the Rainbow Bridge search. Branch A
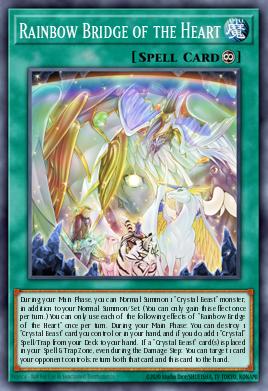
- Rainbow Bridge of the Heart: Activate Heart, destroy crystallized Amber Mammoth, and search Awakening. Branch B
- Crystal Miracle only: Set Miracle. You can still finish on a reduced board, but you won't get Awakening's additional Pegasus. Branch C
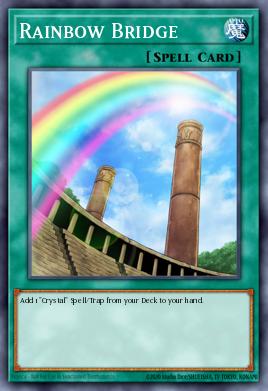
29*) If you drew into (or have) Rainbow Bridge, activate it to grab Awakening of the Crystal Ultimates
30) Summon Rainbow Dragon
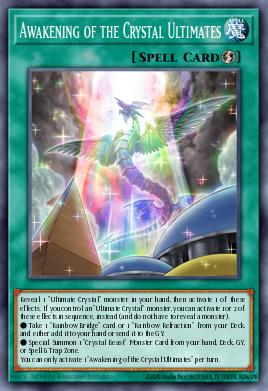
31) activate Awakening to grab Rainbow Bridge of the Heart and Special Crystal Beast Sapphire Pegasus
32) Pegasus crystalize carbunkle.
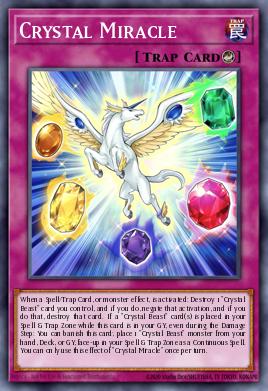
33) Rainbow Bridge of the Heart pop carbunkle to grab Crystal Miracle
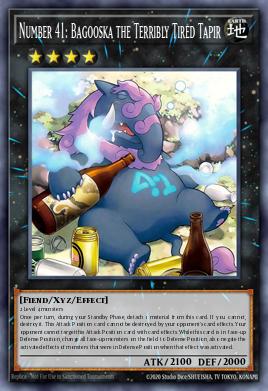
34) Take 2 level 4s and make Number 41: Bagooska the Terribly Tired Tapir (He's banned so make whatever else tickles your fancy. Or just leave em there for 3 spell/trap negates)
Endboard: Crystal Ruins providing 2 S/T negates (or 3 if you dont go into a rank 4 (gotta leave 1 for S:P)) (or 1 in you goin into a 3 material rank 4), an omni negate in Crystal Miracle, I:P into S:P (or W:P if you slot that in instead of bagooska)
*Chance of finding an access piece OR Crystal Miracle itself after the ruins draw : 91.2%
Branch A: You open or draw Awakening
Then replace steps 29–33 with:
29A) Skip Rainbow Bridge. You already have Awakening in your hand.
30A) Special Summon Rainbow Dragon.
31A) Activate Awakening. Since you control Rainbow Dragon, apply both effects in sequence: search Rainbow Bridge of the Heart and Special Summon Sapphire Pegasus.
32A) Pegasus places Ruby Carbuncle in your Spell & Trap Zone.
33A) Activate Heart, destroy the back-row Ruby, and search Crystal Miracle. Set Miracle and proceed to step 34.
Branch B: You open or draw Rainbow Bridge of the Heart
If you get hand trapped or whatever, Don't use Heart's destruction effect before completing step 26. You need your five crystallized monsters to use Rainbow Ruins to Special Summon Carbuncle.
Follow steps 1–28 normally. At this point, you should have three crystallized monsters remaining:
Crystal Beast Rainbow Dragon
Cobalt Eagle
- Amber Mammoth
29B) Activate Rainbow Bridge of the Heart from your hand. Use its effect to destroy your crystallized Amber Mammoth and search Awakening of the Crystal Ultimates.
Your Crystal Beast back-row count temporarily drops from three to two.
30B) Special Summon Rainbow Dragon.
31B) Activate Awakening. Apply both effects in sequence: add a regular Rainbow Bridge from your Deck to your hand and Special Summon Sapphire Pegasus.
32B) Pegasus places Ruby Carbuncle in your Spell & Trap Zone.
You now have three crystallized Crystal Beasts again, restoring Rainbow Ruins's negate.
33B) Activate the Rainbow Bridge you searched with Awakening. Search Crystal Miracle and set it.
- 34B) Make your desired Rank 4, or retain the three Pegasuses and Tortoise.
Branch C: You draw Crystal Miracle itself
If you have Crystal Miracle but none of Rainbow Bridge, Awakening, or Heart, You literally just stop here Special Summon Rainbow Dragon and setting Miracle.
you'd have two Pegasuses and Emerald Tortoise instead of three Pegasuses and Tortoise. That means fewer Crystal Beast monsters available for your Rank 4 and Rainbow Ruins negates.
Turn 3:
If you still have rainbow dragon:
Make Rainbow Overdragon and smack em for 11k
Golden Rule + Ruby Carbuncle — Main Line
Starting hand: Golden Rule + Crystal Beast Ruby Carbuncle.
Assumptions: All necessary engine pieces remain accessible, no interruptions, and no additional cards are needed for the opening sequence.
Note: Dugares makes you skip your next Main Phase 1 when you use its revival effect. So this route is taking you into a longer grind game.
Part 1: Golden Rule into Snake-Eyes
Activate Golden Rule. Place two Sapphire Pegasuses from your Deck into your Spell & Trap Zone, then Special Summon Ruby Carbuncle from your hand. Golden Rule equips itself to Ruby.
Ruby Special Summons both Pegasuses.
Pegasus 1 crystallizes Crystal Beast Rainbow Dragon. Pegasus 2 crystallizes your second Ruby Carbuncle.
Banish Crystal Beast Rainbow Dragon from the back row to Special Summon Topaz Tiger from Deck and search Rainbow Dragon.
Overlay Pegasus 1 and Topaz Tiger into Infernal Flame Banshee. Detach Pegasus 1 to search Snake-Eyes Poplar.
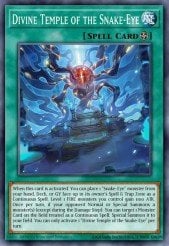
Special Summon Poplar and search Divine Temple of the Snake-Eye.
Activate Divine Temple and place Snake-Eyes Diabellstar from Deck into the back row.
Link Banshee and Poplar into Cross-Sheep. Poplar's GY effect places Banshee in the back row.
Use Diabellstar's effect to place Poplar in the back row and Special Summon Diabellstar.
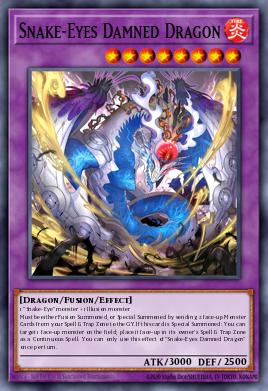
Send the back-row Ruby Carbuncle and Poplar to the GY to Special Summon Snake-Eyes Doomed Dragon into Cross-Sheep's linked zone.
Activate Cross-Sheep as CL1 and Doomed Dragon as CL2.
Doomed Dragon places Pegasus 2 from the Monster Zone into the back row.
Cross-Sheep revives your second Ruby Carbuncle.
Revived Ruby summons Pegasus 2 from the back row. Pegasus 2 crystallizes Pegasus 1 from the GY.
Special Summon Magistus Chorozo by sending Banshee and Diabellstar to the GY.
Synchro Summon Power Tool Dragon using Chorozo and your original Ruby Carbuncle.
Important: You're gonna skip Power Tool's search. You already activated Golden Rule, and your Deck contains only two remaining Equip Spells.
Part 2: Zealantis → Dugares → Quartet
Link Cross-Sheep, Power Tool Dragon, and Doomed Dragon into Worldsea Dragon Zealantis.
Leave your revived Ruby and Pegasus 2 on the field.
Activate Zealantis to banish and resummon your monsters.
Build the resulting chain:
CL1: Ruby Carbuncle.
CL2: Pegasus 2.
Resolve Pegasus first, crystallizing Pegasus 3 from your Deck. Then Ruby summons both crystallized Pegasuses.
You now have Zealantis, Ruby, and three Pegasuses.
The two newly summoned Pegasuses crystallize Emerald Tortoise and Cobalt Eagle.
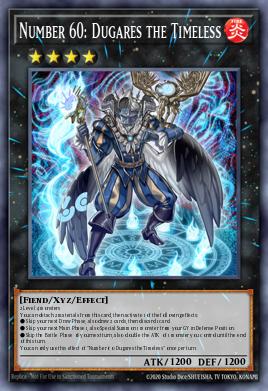
Overlay two Pegasuses into Number 60: Dugares the Timeless.
Detach both materials to Special Summon one detached Pegasus from the GY in Defense Position.
That Pegasus crystallizes your second Crystal Beast Rainbow Dragon.
Be sure to leave the other detached Pegasus in the GY for Quartet.
Link Zealantis, Dugares, and your two fielded Pegasuses into Charmer Quartet in Bloom.
Leave Ruby Carbuncle on the field.
Quartet revives Cross-Sheep and the other detached Pegasus from the GY.
The revived Pegasus crystallizes Amber Mammoth.
Checkpoint: Four crystallized Crystal Beasts
Crystal Beast Rainbow Dragon
Emerald Tortoise
Cobalt Eagle
Amber Mammoth
Special Summon your second Magistus Chorozo by sending Quartet and Cross-Sheep to the GY.
Synchro Summon Ancient Fairy Dragon using Chorozo and Ruby Carbuncle.
Ancient Fairy Dragon destroys Divine Temple to search Ancient City – Rainbow Ruins. Activate Rainbow Ruins.
Rainbow Ruins draws one card using its four-crystal effect.
Checkpoint: You have Ancient Fairy Dragon, Quartet's revived Pegasus, and four Crystal Beasts in the back row. Rainbow Dragon is in your hand.
The four back-row names, plus Sapphire Pegasus, Ruby Carbuncle, and Topaz Tiger on the field or in the GY, satisfy Rainbow Dragon's seven-name requirement.
Proceed to the appropriate finishing branch.
Percentages:
Branches A + B: Awakening finish | 58.3% |
Branches A + B + C: Awakening or direct Miracle access | 65.9% |
Branches A + B + C + D: Any Miracle access, including Heart | 82.6% |
Branch E: None of the access pieces | 17.4% |
Branch A: You have or draw Awakening
25A) Special Summon Rainbow Dragon.
26A) Activate Awakening of the Crystal Ultimates. Apply both effects:
Search regular Rainbow Bridge.
Special Summon a Sapphire Pegasus from your GY.
27A) The summoned Pegasus crystallizes a Ruby Carbuncle from your GY.
You now have five crystallized Crystal Beasts.
28A) Use Rainbow Ruins to Special Summon that Ruby.
This returns you to four crystallized Crystal Beasts. Do not move the other four into the Monster Zones.
29A) Activate the searched Rainbow Bridge to search Crystal Miracle. Set Miracle.
30A) Link Ancient Fairy Dragon and the newly summoned Ruby into I:P Masquerena.
End board:
Rainbow Ruins with four crystallized Crystal Beasts
Set Crystal Miracle
I:P Masquerena
Two Sapphire Pegasuses
Rainbow Dragon
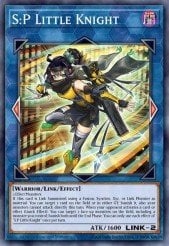
During your opponent's Main Phase, use I:P and Rainbow Dragon to Link Summon S:P Little Knight.
Your two Pegasuses remain available to pay for two Rainbow Ruins Spell/Trap activation negates.
Note: Quartet's revived Pegasus remains material-restricted until the end of the next turn. It can still be sent to the GY to pay Rainbow Ruins's cost.
Branch B: You have or draw regular Rainbow Bridge
25B) Activate Rainbow Bridge to search Awakening of the Crystal Ultimates.
26B) Special Summon Rainbow Dragon.
27B) Continue with Branch A, steps 26A–30A.
End board: Same as Branch A.
Branch C: You have or draw Crystal Miracle, but no Awakening access
25C) Special Summon Rainbow Dragon.
26C) Set Crystal Miracle.
End board:
Rainbow Ruins with four crystallized Crystal Beasts
Set Crystal Miracle
Rainbow Dragon
Ancient Fairy Dragon
One Sapphire Pegasus revived by Quartet
This gives you Crystal Miracle's omni-negate and one potential Rainbow Ruins Spell/Trap negate using Pegasus.
You can Link Ancient Fairy Dragon and Rainbow Dragon into I:P, but this two-card line alone does not leave another eligible monster for I:P to convert into S:P.
Quartet's revived Pegasus cannot be used as Link Material until the end of the next turn.
Branch D: You have or draw Rainbow Bridge of the Heart, but no Awakening access
This is a reduced-board finish. Heart can search Crystal Miracle, but you won't get Awakening's extra Pegasus.
25D) Activate Rainbow Bridge of the Heart in your fifth Spell & Trap Zone.
26D) Use Heart's effect to destroy one of your four crystallized Crystal Beasts, then search Crystal Miracle.
27D) Set Crystal Miracle in the newly freed Spell & Trap Zone.
28D) Special Summon Rainbow Dragon.
End board:
- Rainbow Ruins with three crystallized Crystal Beasts.
- Set Crystal Miracle.
- Rainbow Bridge of the Heart.
- Rainbow Dragon.
- Ancient Fairy Dragon.
- One Sapphire Pegasus revived by Quartet.
Available interruptions: Crystal Miracle's omni-negate and one potential Rainbow Ruins Spell/Trap activation negate. If you want to use both, use Ruins while Pegasus is still available, then pay Miracle's cost with a crystallized Crystal Beast. Miracle will reduce your back-row count to two, disabling further Ruins negates unless you replenish it.
Branch E: No Awakening access and no Miracle
Stop after Rainbow Ruins draws and Special Summon Rainbow Dragon.
You retain Rainbow Ruins with four crystals, Ancient Fairy Dragon, Rainbow Dragon, and Quartet's revived Pegasus.
This is a resource board rather than your intended interruption board. Use any remaining cards in your hand to extend into... something if possible.
You should still have your normal Summon: Unused throughout the Golden Rule + Ruby main sequence.
Turn 3:
The Overdrive setup (excluding branch E. If you in Branch E and somehow made it to turn 3 just do stuff. You're in a gamestate no guide can assist)
- During Turn 2, when you activate Crystal Miracle to negate something, destroy one of your crystallized Crystal Beasts if you still need the seventh Overdrive material. If you're preserving Rainbow Ruins, remember that going from four crystals to three costs you its next draw.
- You now have seven Crystal Beast monsters available across your field/GY: three Pegasuses, two Rubies, Topaz Tiger, and the destroyed Crystal Beast.
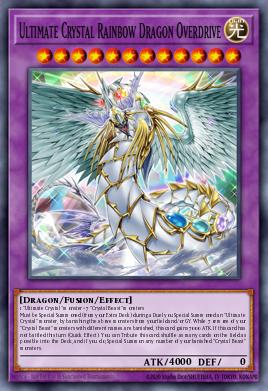
- Use I:P and Rainbow Dragon to make S:P, placing Rainbow Dragon in your GY. If you already made S:P this way, that part is complete.On Turn 3, after your skipped MP1 and done your Battle Phase, Special Summon Overdrive in MP2 by banishing Rainbow Dragon and the seven Crystal Beasts.
Your branches don't all have the same access to Overdrive.
A/B — Awakening finish | If Miracle destroyed a back-row Crystal Beast and Rainbow Dragon reached the GY, pursue Overdrive in MP2. If not, preserve your remaining Rainbow Ruins resources and wait for a way to establish its materials. |
C — Direct Miracle | You have Rainbow Dragon, Ancient Fairy Dragon, and Pegasus. Use Miracle on a back-row Crystal Beast if you need the seventh Overdrive material. Link Summon S:P using them directly. This puts Rainbow Dragon in your GY, satisfying that part of Overdrive's summoning requirement. You won't get S:P's on-summon banish because you didn't use a Link Monster as material. However, its separate Quick Effect remains available. |
D — Heart-only | Heart already destroyed a back-row Crystal Beast, giving you the seventh potential Overdrive material. Protect Rainbow Dragon and Link Summon S:P using them directly. This puts Rainbow Dragon in your GY, satisfying that part of Overdrive's summoning requirement. You won't get S:P's on-summon banish because you didn't use a Link Monster as material. However, its separate Quick Effect remains available. |
E — No Miracle | You generally have six eligible Crystal Beasts. You need to move another crystallized Beast to the GY, potentially through a subsequent Heart search, before Overdrive becomes available. |
There is also a useful battle-oriented option for Branches C, D, and E.
If all three monsters survive, Rainbow Dragon (4000), Ancient Fairy Dragon (2100), and Pegasus (1800) represent 7900 damage against an empty field. You can attack with them during Turn 3 despite skipping MP1.
That's 100 short of lethal, but even a small amount of earlier damage can turn it into a win. Remember: you still got a normal summon and your Field Spell
What does each relevant post turn 2 topdeck accomplish in the Golden Rule Branch?
Now for the part that matters most when playing the golden rule route.
I'm assuming you've completed the Golden Rule main sequence, including the four-crystal Rainbow Ruins checkpoint. The full combo uses all three Pegasuses, both Rubies, both Crystal Beast Rainbow Dragons, and your single-copy Crystal Beast names.
That means some cards that were starters on Turn 1 are substantially weaker as Turn 3 topdecks.
A. Engine and Crystal Beast topdecks
Crystal Bond [dead draw] | Usually dead after the complete Golden Rule line. All your Main Deck Crystal Beasts have been removed from the Deck, and Bond needs two different names in the Deck. |
Rainbow Bridge | Search a usable Crystal Spell/Trap. Heart is an option if it can destroy an available Beast; another Golden Rule or Awakening may be available but won't necessarily be usable. Do not auto search Bond. |
Rainbow Bridge of the Heart | If you have a free S/T Zone, destroy a crystallized Beast to search a Crystal card. This can put another CB into the GY for Overdrive. If Miracle is still in the Deck, it can also search Miracle. |
Golden Rule [Dead Draw] | Usually dead immediately after the complete line: your Deck has no Crystal Beast monsters left to place, and your S/T Zone is heavily occupied. |
Awakening of the Crystal Ultimates | Strong if Rainbow Dragon or Overdrive remains face-up on your field. If Rainbow Dragon was used for S:P and is now in the GY, Awakening is not automatically live. |
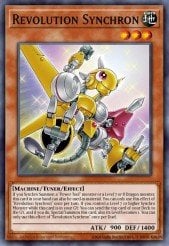
Revolution Synchron | Not an immediate recovery starter by itself. Basically 900 damage at that point. ya did skip the battle phase so keep it in hand till turn 5. |
Golden Rule's Deck-placement requirement and Awakening's Ultimate Crystal condition are particularly important here.
One subtle point with Heart: if you use it to destroy a back-row Crystal Beast, check your zones before activating it. Four crystallized Beasts plus a set Miracle already occupy all five Spell & Trap Zones. You would first need a zone freed by using Miracle or losing another card.
Also if four crystals survive, you can use Ruin's its draw effect again in Turn 3's MP2. If you already reduced the count to three with Miracle, that draw is unavailable until you replenish your crystals.
B. Defensive topdecks
These are the best cards that help you reach the Overdrive turn.

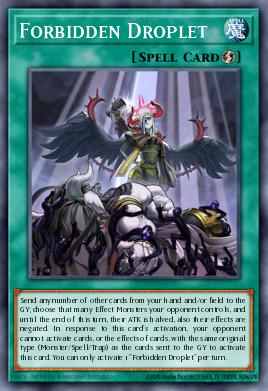
Forbidden Droplet — 3 copies
Useful for breaking an opponent's remaining board before you attempt to summon Overdrive.
You can also use redundant cards in hand or on your field as its cost. But remember that you cannot send your Rainbow Ruins crystallized monsters indiscriminately if you still need them for your game plan.
Droplet is especially helpful when Overdrive is ready but your opponent has monster-effect disruption.

Forbidden Crown — 3 copies
Use Crown to disable an opponent's important monster. Its material restriction can also prevent that monster from being used to build another Extra Deck monster.
Do not use it on your own Overdrive if you're trying to wipe the field. Crown negates the chosen monster's effects and prevents it from being Tributed.
If you draw Crown on Turn 3 and intend to use it during Turn 4, set it in MP2.

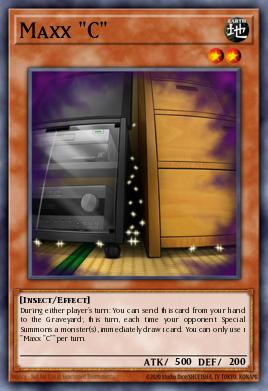
Maxx "C" — 1 copy
Hold it for your opponent's Turn 4.
Unlike Fuwalos, it doesn't require you to control no cards. Drawing additional defensive cards can help you keep Overdrive alive, and drawing Heart or Rainbow Bridge may provide another line if the board is disrupted.

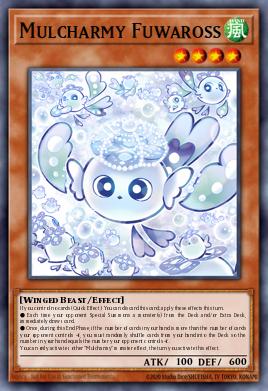
Mulcharmy Fuwalos — 3 copies
This is generally a bad topdeck while your Golden Rule board survives.
Fuwalos requires you to control no cards when activating its effect. You cannot use it while you still have Rainbow Ruins, crystals, or a monster.
If your opponent completely clears your board, however, Fuwalos becomes a recovery tool for their subsequent turn. But if you're getting wiped this late, you're prolly dead.
Turn 5 - finish em:
If your opponent has an empty field, you can attack directly with:
- Crystal Beast Rainbow Dragon: 3,000 ATK
- Three Sapphire Pegasuses: 5,400 ATK total
- Topaz Tiger: 1,600 ATK
Total: 10,000 potential direct damage.
The Crystal Beast Rainbow Dragon you banished during your original combo is still available for Overdrive to Special Summon.
This is a potential OTK, not a guaranteed one. Your opponent may rebuild their field, remove your monsters, or interrupt the wipe.
If you cannot establish lethal, use any surviving monsters and remaining cards to continue the Duel.
Pegasus only — "I got literally nothing, but I think my opp is a toddler" line
If you literally only have pegasus and no other starters congrats! You hit the 9.93% and should probably grab a scratch off ticket.
Life sucks but you can still get an interruption!
- Normal Summon Sapphire Pegasus. Crystallize Crystal Beast Rainbow Dragon.
- Banish Crystal Beast Rainbow Dragon to summon Topaz Tiger from your Deck, with its effects negated, and add Rainbow Dragon to your hand.
- Overlay Pegasus and Tiger into Infernal Flame Banshee. Detach Pegasus to search Snake-Eyes Poplar.
- Special Summon Poplar and search Divine Temple of the Snake-Eye. Activate Temple and place Snake-Eyes Diabellstar in the back row.
- Link Banshee and Poplar into Cross-Sheep. Poplar places Banshee in the back row.
- Activate Diabellstar, placing Poplar in the back row to Special Summon itself.
- Send your two back-row Monster Cards, Banshee and Poplar, to the GY to Special Summon Snake-Eyes Doomed Dragon into Cross-Sheep's linked zone.
- Cross-Sheep revives Sapphire Pegasus from the GY. Pegasus crystallizes Ruby Carbuncle from your Deck.9. Link Doomed Dragon and Diabellstar into I:P Masquerena. Leave Cross-Sheep and Pegasus on the field.
endboard:
- i:p into S:p using cross sheep and a rainbow dragon in hand + whatever other junk ya got.
Good news: You have a 64.82% chance that at least one of your other four opening cards is Forbidden Droplet, Forbidden Crown, or Maxx "C", giving you another potential interruption or defensive play.
Remember to set Droplet or Crown before ending your turn if you intend to activate it during your opponent's turn. Rainbow Dragon in hand can also serve as Droplet fodder.
Playing through hand traps — Crystal Bond line
Before activating Crystal Bond, check the rest of your hand.
| Bridge + Bond | Lead Bridge to bait Ash or Purge. If it resolves, search Awakening; then play Bond. |
| Bond + Golden Rule | Hold Golden Rule. Skip Power Tool's search and activate Rule from hand at step 13. |
| Bond + Golden Rule + Ruby | Lead Bond. If it gets negated, switch into the Golden Rule + Ruby line. |
| Bond + Pegasus | If Bond gets negated, Normal Summon your independently drawn Pegasus and pursue the Pegasus-only fallback. |
| Bond + Awakening | Save Awakening for the final sequence, assuming you can resolve Bond and reach Rainbow Dragon. |
| Bond + Heart | Keep Heart in hand until the finishing branch if possible. Activating it early occupies a valuable Spell & Trap Zone. |
If your monster effects are negated:
Pegasus: Continue through Banshee and Cross-Sheep if possible. Revive Pegasus to recover its crystallization effect, then use the Pegasus-only fallback.
Crystal Beast Rainbow Dragon: No Tiger or Rainbow Dragon search. You've already used your Normal Summon, so the standard Bond opening stops with Pegasus on the field and Ruby crystallized. If you have Rainbow Dragon in hand, you've preserved access to your boss monster, but still need another Level 4 to make Banshee. Heart + a Level 4 Crystal Beast can provide an additional Normal Summon. Golden Rule + Ruby can supply additional Pegasuses. Without an extender, there's no guaranteed I:P → S:P fallback. Even with Rainbow Dragon in hand, you'll need to establish its seven-name summoning requirement separately.
Banshee: Without another route to Poplar, the Snake-Eyes sequence stops. So no Poplar search. With only the standard Bond opening, you're left with Banshee and crystallized Ruby, which isn't enough for I:P → S:P. An independently available extender is required. If you have Golden Rule + Ruby in hand, you can pivot into a separate Rank 4/I:P → S:P setup and fnagle your way to the endgame from there.
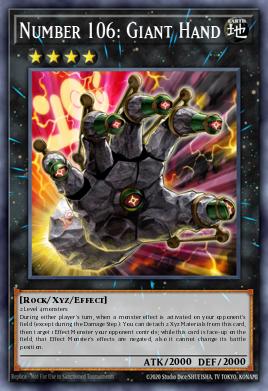
Poplar: If Divine Temple is already in hand, activate it and continue. Otherwise, Golden Rule + Ruby provides the same Rank 4 + I:P pivot as the Banshee scenario. Link Banshee + Poplar into I:P, then overlay the two Pegasuses into Giant Hand or Rafflesia. During the opponent's turn, use the Rank 4's interruption before converting it into S:P with I:P. Without another extender, Banshee + Poplar alone can make I:P, but not a complete I:P → S:P interruption.
Cross-Sheep: You lose Ruby's GY revival. Check for an independently available extender.
- Cross-Sheep negated: If you still have Cross-Sheep after the negate: then you still have Cross-Sheep, Doomed Dragon, and Diabellstar. Link Doomed + Diabellstar into I:P, then use I:P + Cross-Sheep for S:P during the opponent's Main Phase. This provides S:P's on-summon banish and Quick Effect banish. No additional extender required.
- If Golden Rule is in hand: Place your two remaining Pegasuses, Special Summon Ruby from the GY, and use Ruby to summon both Pegasuses. You can make a Rank 4 alongside I:P. This is a stronger fallback, but not the original full board.
- If Rainbow Bridge is available: Search Golden Rule and follow the previous fallback, assuming Golden Rule and both Pegasuses are still available in the Deck.
Power Tool: Continue if Golden Rule is already in hand.
Zealantis or Quartet: Do not assume the full Rainbow Ruins board is still available.
Ancient Fairy Dragon: Continue if Rainbow Ruins is already in hand; otherwise pivot to a reduced board.
Rainbow Ruins draw: If you already have Awakening, Bridge, Heart, or Miracle, you can still complete the corresponding finishing branch.
Against the Dominus cards:
Dominus Impulse — Special Summon-effect negate
Cannot negate Crystal Bond itself.
Can negate Crystal Beast Rainbow Dragon's effect, preventing both the Tiger summon and Rainbow Dragon search.
Can also negate Cross-Sheep's revival, Ruby's summon effect, Zealantis, Quartet, and Awakening when it includes a Special Summon.
If it hits Cross-Sheep, you lose the Ruby revival required for the normal Power Tool sequence.
What to do: If Impulse hits Crystal Beast Rainbow Dragon, look for another Level 4 to make Banshee. If it hits a later revival, check whether Golden Rule or another extender can supply the missing monster.
Dominus Purge — Search-effect negate
Can hit Rainbow Bridge, Crystal Bond, Crystal Beast Rainbow Dragon, Banshee, Poplar, Power Tool, Ancient Fairy Dragon, and Rainbow Ruins's draw.
Cannot negate Pegasus simply crystallizing a monster from the Deck.
Bridge + Bond lets you lead Bridge to bait Purge, just like Ash.
What to do: If Purge hits Bridge, continue with Bond. If it hits Bond, switch starters if possible. If it hits Power Tool, having Golden Rule in hand saves that step.
Dominus Spark — Monster banish
Spark can be activated from the opponent's hand after you've activated a monster effect in your hand or GY that turn.
Your Poplar self-Summon effect is an early opportunity for it to become live.
Banishing Cross-Sheep removes a required Link Monster.
Banishing Ruby or Pegasus removes resources your combo expects to recycle.
Banishing an Extra Deck monster can disrupt the Chorozo, Zealantis, or Quartet setup.
Spark does not negate an already-activated effect.
Dominus Spiral — Monster bounce
Spiral has the same hand-activation condition as Spark, but returns a monster to the hand or Extra Deck.
If it returns your Normal Summoned Pegasus, you generally cannot Normal Summon it again that turn.
If it returns Banshee, Cross-Sheep, Power Tool, or another Extra Deck monster, that monster returns to the Extra Deck. If it returns a monster whose effect already activated, that effect can still resolve if it doesn't require the monster to remain on the field.
What to do against Spark/Spiral: Check whether their hand-activation condition is actually satisfied. Once Poplar activates in hand or GY, account for both cards. Recount your remaining materials after either resolves.
Dominus reminder: Impulse and Purge can activate from the opponent's hand once you control a card, including a Spell you've just activated.
Against Fydraulis Harmonia + Golden Cloud Beast – Malong:
Assuming your opponent reveals Fydraulis + five Synchros, sending Golden Cloud Beast – Malong to the GY.
This gives them:
Fydraulis (2500 ATK) on the field.
Destruction of one monster you control.
Malong's separate GY effect, which targets one face-up card you control and returns it to the hand.
If they chain Fydraulis to your first Pegasus:
Fydraulis destroys Pegasus, but Pegasus's already-activated crystallization effect still resolves. You can crystallize Pegasus itself instead of sending it to the GY, if you have room.
Malong activates in a new Chain after Pegasus's effect resolves. It can bounce your crystallized Ruby, Crystal Beast Rainbow Dragon, or another face-up card.
If Malong targets Crystal Beast Rainbow Dragon, you can chain Rainbow Dragon's effect to banish itself, summon Topaz Tiger, and search Rainbow Dragon. Malong then loses its target.
If Malong targets Ruby, it returns to your hand. You still have access to Crystal Beast Rainbow Dragon, but you've lost the Ruby placement needed for your normal Cross-Sheep sequence.
What to do: You've already spent your Normal Summon and lost Pegasus from the Monster Zone. Even if Crystal Beast Rainbow Dragon resolves, Topaz Tiger alone cannot make Banshee.
If you have Heart + another Level 4 Crystal Beast, Golden Rule + Ruby, or another playable extender, check whether you can rebuild. Otherwise, the documented full line stops.
If Fydraulis hits later:
Destroying Banshee or Cross-Sheep after its effect activates doesn't inherently negate that effect. However, Malong can then bounce another face-up card, potentially removing an additional material or a crystallized Crystal Beast.
Always account for BOTH removals before continuing. Don't assume you can recover just because the first monster's effect resolved.
Against Droll:
If your opponent Drolls immediately after Crystal Bond adds Pegasus, the standard one-card combo stops.
You can still Normal Summon Pegasus and crystallize Ruby, but Crystal Beast Rainbow Dragon cannot activate its back-row effect to summon Tiger because the effect also requires adding an Ultimate Crystal monster.
Possible recoveries:
Heart + another Level 4 Crystal Beast: Use Heart's additional Normal Summon to make Giant Hand or Rafflesia if you opted into them.
Golden Rule + Ruby in hand: Activate Rule, summon your two remaining Pegasuses with Ruby, then make a Rank 4 with two Pegasuses and I:P Masquerena with the third Pegasus + Ruby. Convert I:P + the Rank 4 into S:P after using the Rank 4's interruption.
No extender: You're left with Pegasus and two crystallized Crystal Beasts. No guaranteed I:P → S:P. Scoop it up.
Bridge + Bond warning: If you lead Bridge and the opponent Drolls after its search, you cannot activate Bond afterward. Bridge is useful Ash bait, but it exposes you to an earlier Droll window.
Against Nibiru: Your fifth summon is Cross-Sheep. The standard line has no established monster negate before that summon.
However, If Nibiru resolves here, you can still recover into Masquerena → Little Knight!
After Nibiru resolves, use Poplar's GY effect to crystallize Banshee if you haven't already. Diabellstar is still in your back row.
Activate Diabellstar to crystallize Poplar from the GY and Special Summon itself. Send your back-row Ruby and Poplar to the GY to summon Doomed Dragon.
Doomed Dragon can place the opponent's Nibiru in their back row.
Link your Primal Being Token + Diabellstar into I:P, leaving Doomed Dragon on the field.
During the opponent's Main Phase, use I:P + Doomed Dragon for S:P. You get S:P's on-summon banish and Quick Effect banish.
This doesn't restore Rainbow Ruins + Miracle, but you still get a legitimate interruption board without an additional extender.
Against Maxx "C" or Fuwalos: Consider stopping early rather than giving the opponent a full hand of additional cards.
Rule of thumb: The Bond line has multiple vulnerable searches. Your opening hand determines whether a negated search means a complete stop, a Golden Rule pivot, or the Pegasus-only fallback.
Playing through hand traps — Golden Rule + Ruby Carbuncle
Golden Rule itself dodges Ash, but NOT Dominus Impulse. Your important early choke points are Ruby's first Special Summon effect, Crystal Beast Rainbow Dragon, Banshee, and Cross-Sheep.
Before starting:
Golden Rule + Ruby + Bond: Lead Bond. If it's negated, switch to Golden Rule.
Golden Rule + Ruby + Bridge: Bridge can bait Ash or Purge, but exposes you to Droll earlier. Search Bond for a backup starter or Awakening for your intended Golden Rule finish.
Golden Rule + Ruby + Awakening: Save Awakening for the final branch.
Golden Rule + Ruby + another Pegasus: Preserve your Normal Summon as a possible recovery play.
If you get interrupted:
Golden Rule negated: No two crystallized Pegasuses or Ruby summon. You need another starter.
Ruby negated: The two Pegasuses remain crystallized. Without another way to summon them, the full line stops.
One Pegasus negated: The other placement can resolve. Check whether you can supply the missing Crystal Beast.
Crystal Beast Rainbow Dragon negated: No Tiger or Rainbow Dragon search. Two Pegasuses can still make Banshee, but the original line no longer applies.
Banshee negated: If Poplar is already in hand, you can Normal Summon it and search Divine Temple, but the later Pegasus setup requires adjustment.
Poplar search negated: Continue if Divine Temple is already in hand.
Cross-Sheep or Ruby's second summon negated: The documented Power Tool setup breaks.
Zealantis negated: No mass resummon. Pivot to a reduced board.
Dugares negated: No extra Pegasus revival. Don't assume you'll reach four crystals.
Quartet negated: No second Chorozo/Ancient Fairy Dragon continuation.
Ancient Fairy Dragon negated: If Rainbow Ruins is already in hand, activate it directly. Otherwise the Ruins finish is lost.
Rainbow Ruins draw negated: Continue with the appropriate branch if you already have an access piece.
Against the Dominus cards:
Dominus Impulse — Special Summon-effect negate
Can negate Golden Rule itself! If it does, you don't place your two Pegasuses or summon Ruby.
Can negate Ruby's initial effect, leaving your two Pegasuses crystallized.
Can also negate Crystal Beast Rainbow Dragon, Cross-Sheep, Ruby's later summon effect, Zealantis, and Quartet.
Cannot negate Doomed Dragon's Special Summon procedure or the actual Link Summon of an Extra Deck monster.
What to do: If you have Bond + Golden Rule + Ruby, leading Bond gives you a separate possible starter. If Impulse hits Ruby, look for another way to Special Summon your crystallized Pegasuses.
Dominus Purge — Search-effect negate
Cannot negate Golden Rule or Ruby's summon effect.
Can negate Crystal Beast Rainbow Dragon's Tiger/Rainbow Dragon search.
Can also negate Banshee, Poplar's search, Ancient Fairy Dragon's search, and Rainbow Ruins's draw.
If you opened Awakening or Rainbow Bridge, losing the Ruins draw is less damaging than losing your initial Rainbow Dragon search.
What to do: If Rainbow Dragon gets negated, your two Pegasuses can still make Banshee. However, you'll need another way to establish Rainbow Dragon's seven-name requirement.
Dominus Spark — Monster banish
Spark becomes live from the hand after you've activated a monster effect in your hand or GY that turn.
Your Poplar self-Summon effect is the important early trigger.
Banishing Ruby can break your Ruby recycling.
Banishing Pegasus 2 removes a monster the combo expects to recycle.
Banishing Cross-Sheep or another required Extra Deck monster can break the later material setup.
Dominus Spiral — Monster bounce
Spiral has the same hand-activation condition as Spark, but returns a monster to the hand or Extra Deck instead of banishing it.
Your Normal Summon is unused in the Golden Rule line.
If Spiral returns a Pegasus to your hand, you may be able to Normal Summon it to recover.
Returning Cross-Sheep, Power Tool, Dugares, or another Extra Deck monster can break the resource sequence.
What to do against Spark/Spiral: Don't automatically abandon the combo if an already-activated effect loses its monster. Let that effect resolve, then recount your field and GY. If Pegasus returns to hand, check whether your Normal Summon restores a required placement.
Dominus reminder: The Attribute restrictions from hand-activated Dominus cards apply to your opponent, not you.
Against Fydraulis Harmonia:
Assume your opponent reveals Fydraulis + five Synchros, applying all three effects:
Special Summons Fydraulis (2500 ATK).
Sends one revealed Synchro to their GY.
Destroys one monster you control.
Fydraulis does not negate your effects or restrict your Extra Deck. Its non-Synchro restriction applies to your opponent.
If they chain Fydraulis to Ruby's initial effect:
Ruby is your only monster at this point, so Fydraulis destroys Ruby.
Ruby's already-activated effect can still resolve, summoning your two crystallized Pegasuses.
You can choose to crystallize the destroyed Ruby instead of sending it to the GY, provided you have room.
Both Pegasuses can still crystallize their intended cards.
You can continue toward Banshee using Pegasus and Topaz Tiger.
BUT: Your original Ruby is no longer in its intended Monster Zone. The documented line needs that Ruby later for Power Tool Dragon.
What to do: Check whether you can recover Ruby from the back row or use your unused Normal Summon and other cards to adjust the sequence. Do not assume the full combo remains intact.
If Fydraulis hits later:
Destroying Banshee after its search activates doesn't inherently stop the search.
Destroying Cross-Sheep after its revival activates doesn't inherently stop the revival.
Destroying Ruby before its second summon effect activates can break your Pegasus recycling.
Destroying Pegasus 2 before the Doomed Dragon setup can remove a required resource.
Destroying Dugares after its revival effect activates doesn't inherently negate the revival, but may affect later Link Materials.
Remember that the Synchro sent to your opponent's GY may provide additional interaction.
Against Nibiru: Your fifth summon is Banshee. The full line is vulnerable before Banshee can search Poplar.
Your fifth summon is Infernal Flame Banshee.
If Nibiru resolves immediately after Banshee's summon, before its search, you're left with a Primal Being Token, your second Ruby crystallized, Rainbow Dragon in hand, and an unused Normal Summon.
You cannot activate another Golden Rule that turn, and the standard combo cannot continue.
No guaranteed I:P → S:P from Golden Rule + Ruby alone. You'll need another playable extender.
If the opponent is a drooling simian and waits until Banshee's effect activates before using Nibiru, the search still resolves. Check whether the resulting Poplar access and your remaining hand allow a recovery play.
Against Droll:
Your opponent's first normal Droll opportunity is after Crystal Beast Rainbow Dragon searches Rainbow Dragon.
By then, you control Ruby, two Pegasuses, and Topaz Tiger.
Fallback:
Overlay both Pegasuses into Giant Hand or Rafflesia if ya opted into em. Scoop otherwise
Link Ruby + Topaz Tiger into I:P Masquerena.
Set any additional defensive cards.
During your opponent's Main Phase, use the Rank 4's interruption, then convert I:P + the Rank 4 into S:P Little Knight.
End board: Giant Hand/Rafflesia + I:P → S:P, with Rainbow Dragon in hand.
You can send Poplar to the GY using Banshee under Droll, but that does not get you Divine Temple or Poplar's hand Special Summon. Without an additional extender, don't assume the full Snake-Eyes line is still available.
Important: If the opponent Drolls after an earlier Rainbow Bridge search, Crystal Beast Rainbow Dragon's effect cannot be used. Golden Rule + Ruby can still make either a Rank 4 or I:P → S:P using its three monsters, but not both without another extender.
Against Maxx "C": The opponent can draw from your early Ruby and Pegasus summons. Consider stopping rather than giving them a massive hand.
Against Fuwalos: It doesn't draw from Golden Rule's hand summon or Ruby's back-row summons. It DOES draw from Tiger's Deck summon and qualifying Extra Deck summons.
Rule of thumb: You can often preserve some monster material after one interruption. That doesn't mean you can still make Rainbow Ruins + Miracle + I:P. Recount your Pegasuses, Rubies, available Crystal Beast names, and back-row zones before committing to the next Extra Deck summon.
Main Deck (44 Card Deck)






Extra Deck


Side Deck

Deck Breakdown
Archetype and card type distribution for this list.
YouTube Video
Other Decks on YGOPRODeck
More Master Duel Decks deck lists from the community.
 Cool
0
Cool
0
 Funny
0
Funny
0
 Angry
0
Angry
0
 Sad
0
Sad
0